
Create EC2 Instance
Create EC2 Instances and login remotely.
- Go to https://emorymicrobiome.signin.aws.amazon.com/console
- Log in with:
- Username: your email that you provided for the course registration
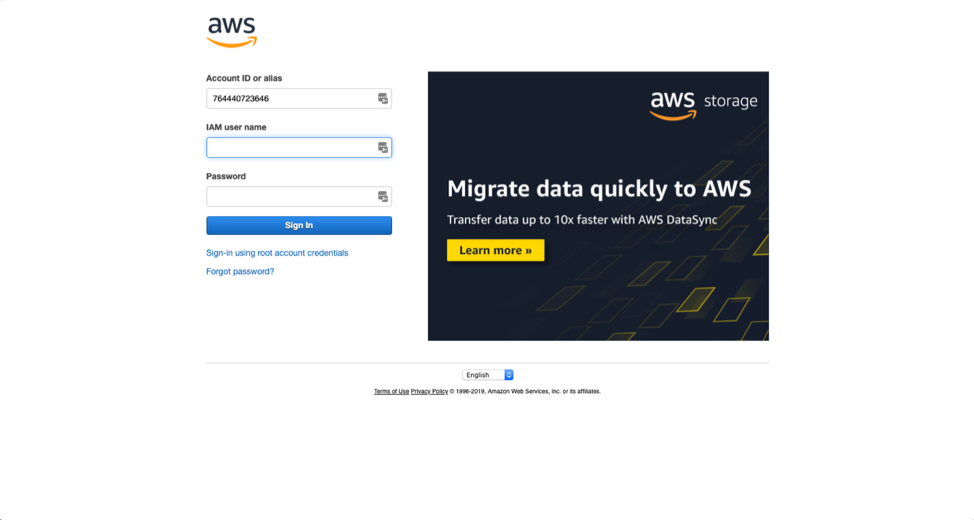
- Username: your email that you provided for the course registration
- Once logged in, make sure you are in the appropriate region, N. Virginia
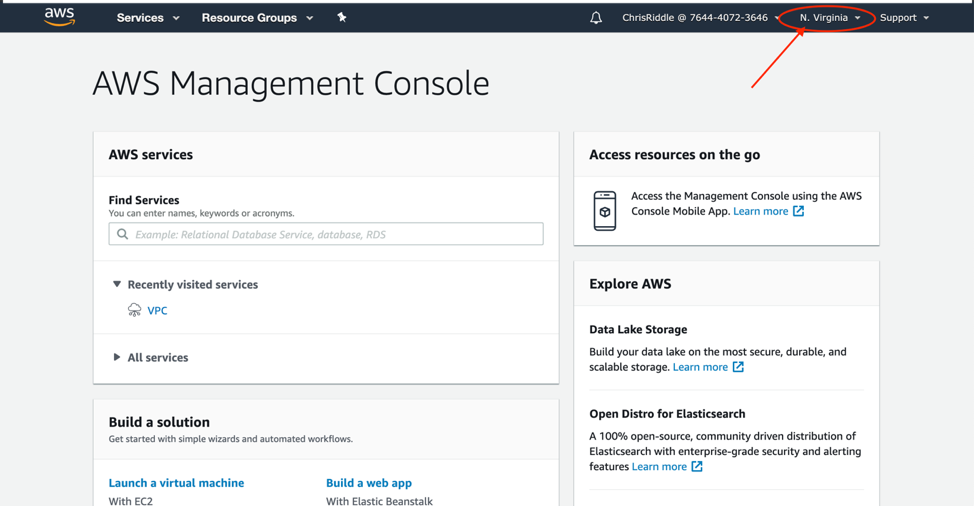
- Click the Services link at the top left of the page
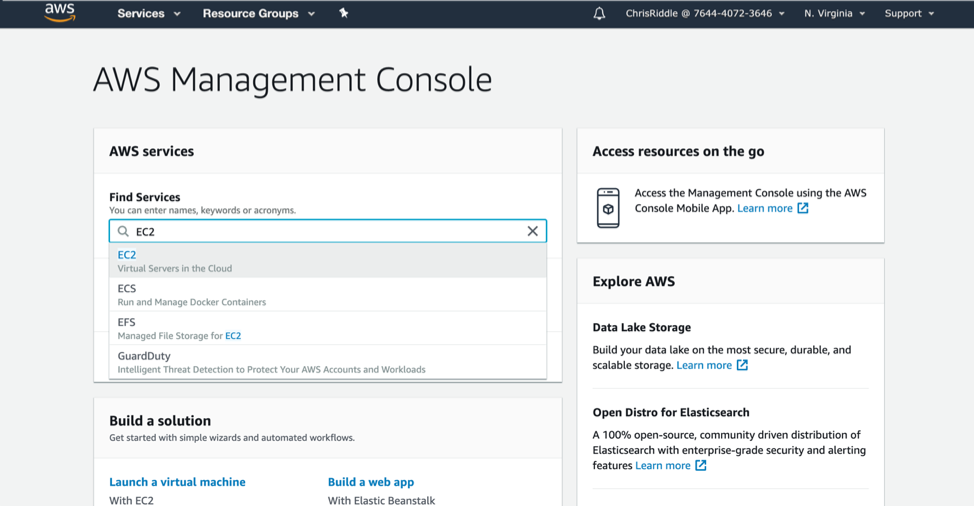
- Search for, or select, EC2
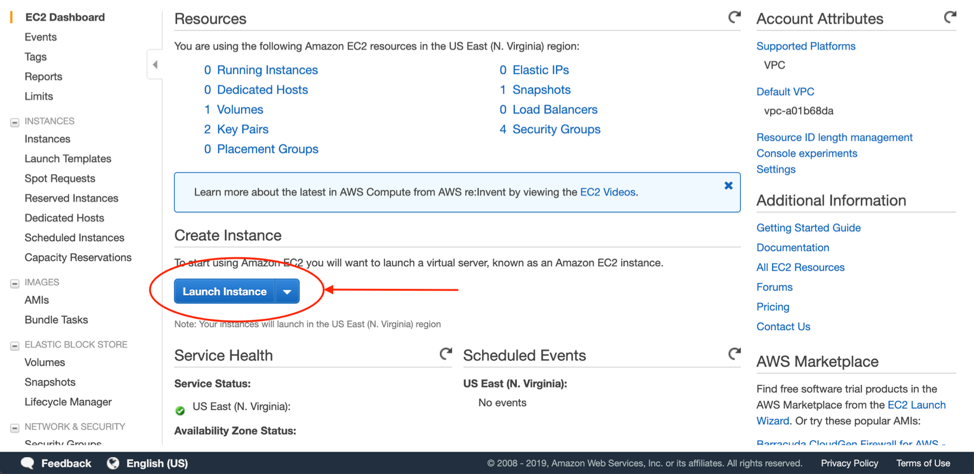
- Click the Launch Instance button
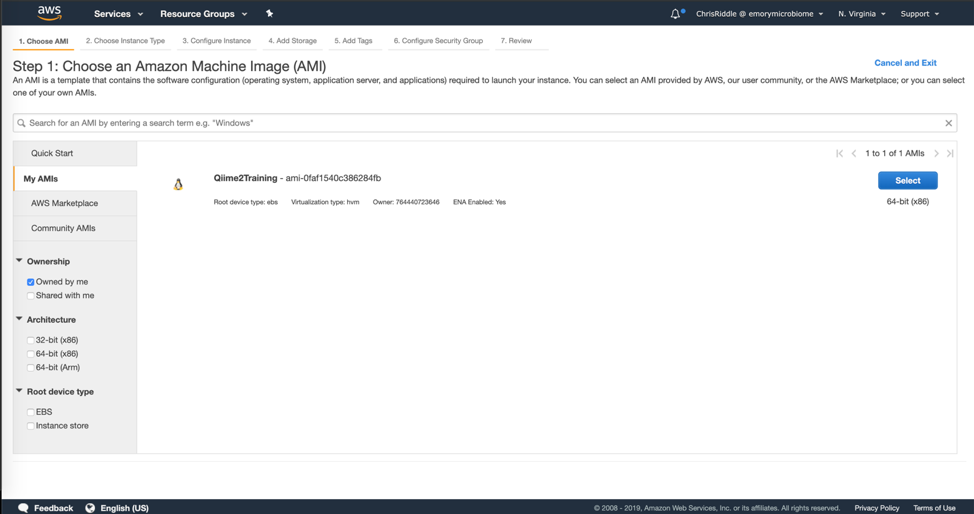
- Choose an Amazon Machine Image (AMI)
- Select My AMIs on the left-hand menu
- Select the Qiime2Training
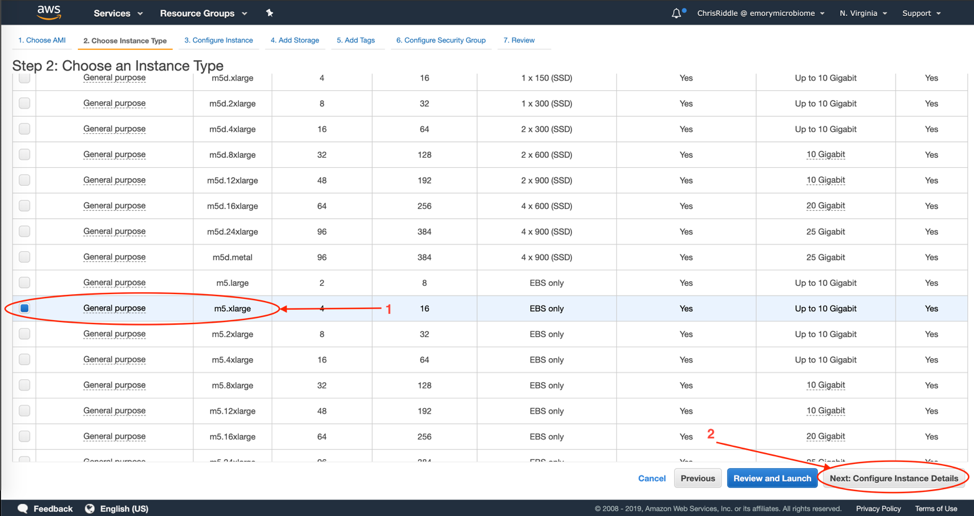
- Choose an Instance Type
- Select m5.xlarge instance
- Click the Next: Configure Instance Details button
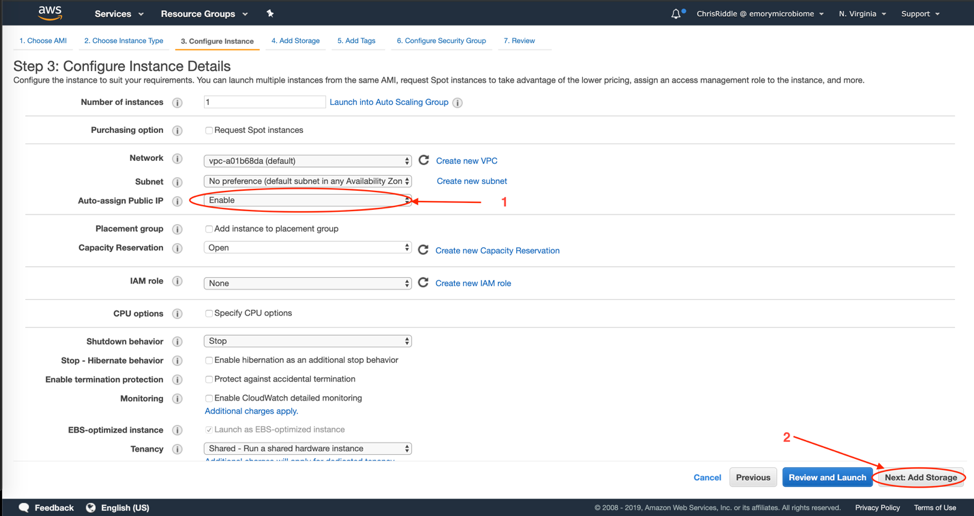
- Configure Instance Details
- Under Auto-assign Public IP, select Enable
- Leave all other settings default on this page
- Click the Next: Add Storage button
- Add Storage
- Update the size field to 50
- Click Next: Add Tags

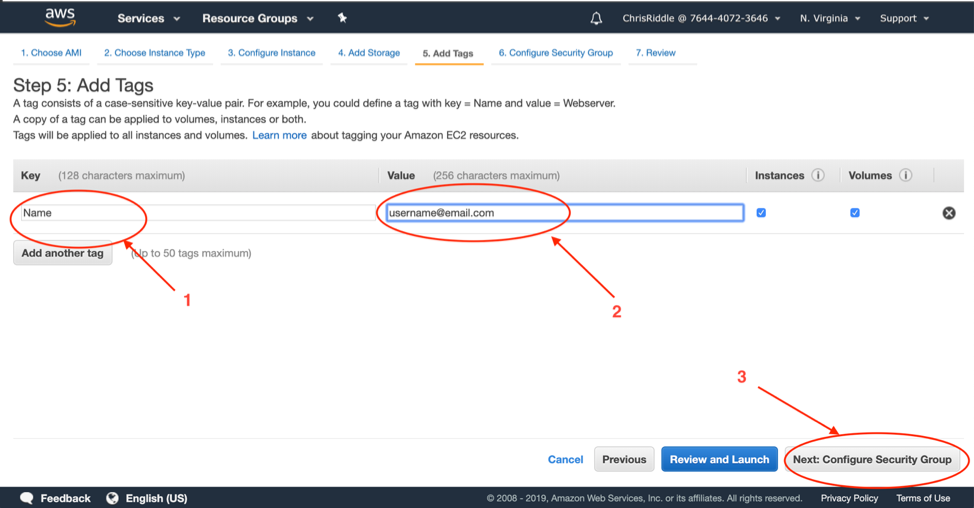
- Add Tags
- Click the "click to add a Name Tag" link
- It should auto-populate the Key type, if not type in "Name" (without quotes)
- For the Value type in your email address that you used to register for this workshop
- username@email.com
- Leave other options as default
- Click Next: Configure Security Group
- Click the "click to add a Name Tag" link
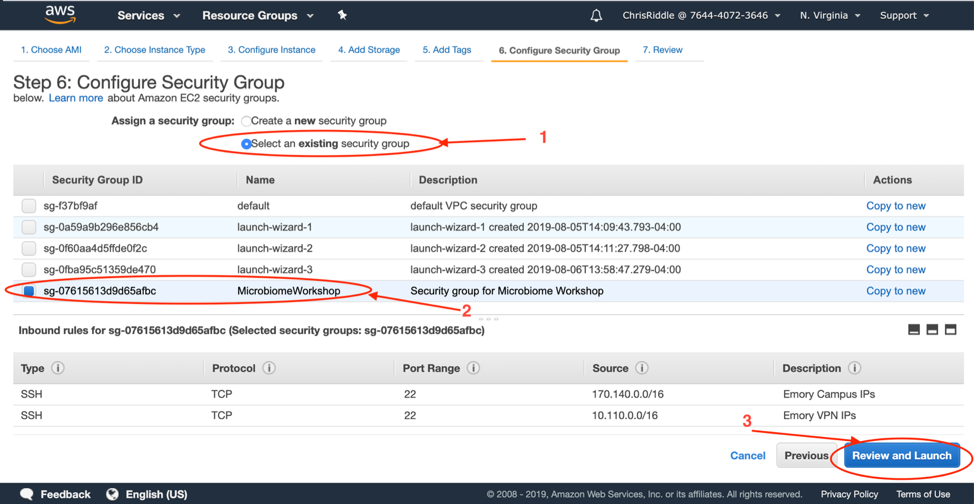
- Configure Security Group
- Choose the "Select an existing security group" option
- In the list of security groups, select the "MicrobiomeWorkshop" security group
- Click the Review and Launch Button
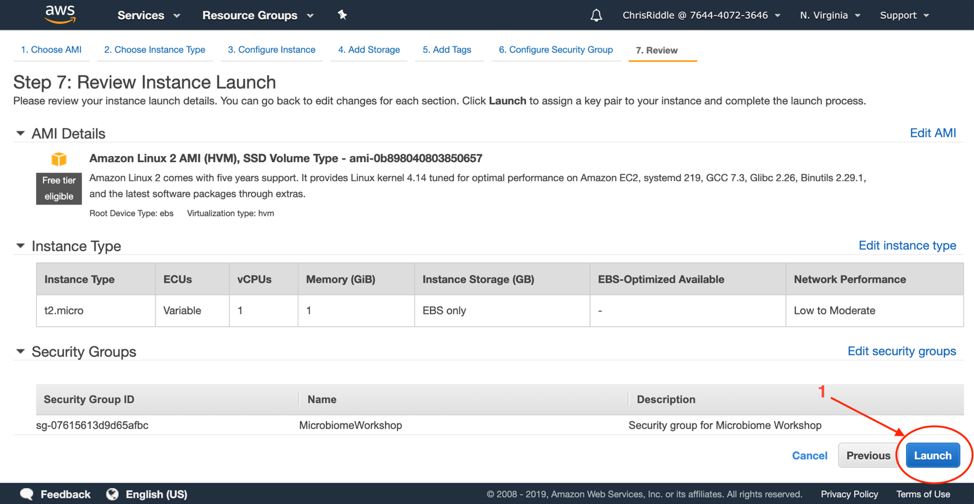
- Review Instance Launch
- Review the information on this page and make sure it is accurate
- Click the Launch button
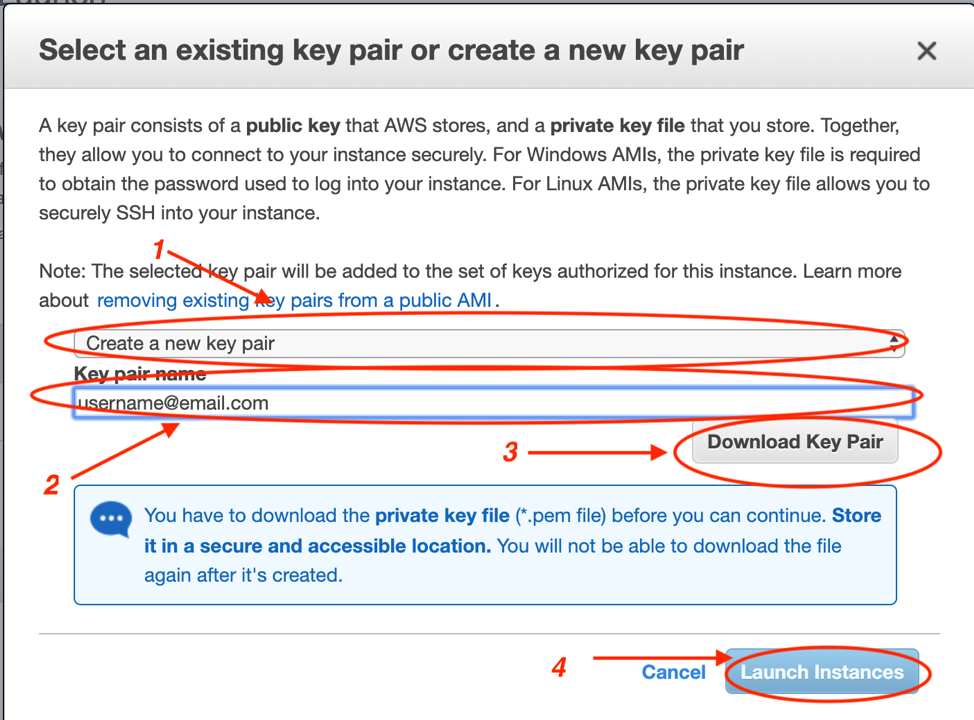
- Select an existing key pair or create a new key pair:
- Select Create a new key pair in the first drop down list
- Type in your email address that you used to register for this workshop
- username@email.com
- Click the Download Key Pair
- Note the location where this key pair is stored (most likely in your Downloads folder)
- Once you've downloaded the key pair click the Launch Instances button
- On the following screen, scroll down and click the View Instances button in the bottom right
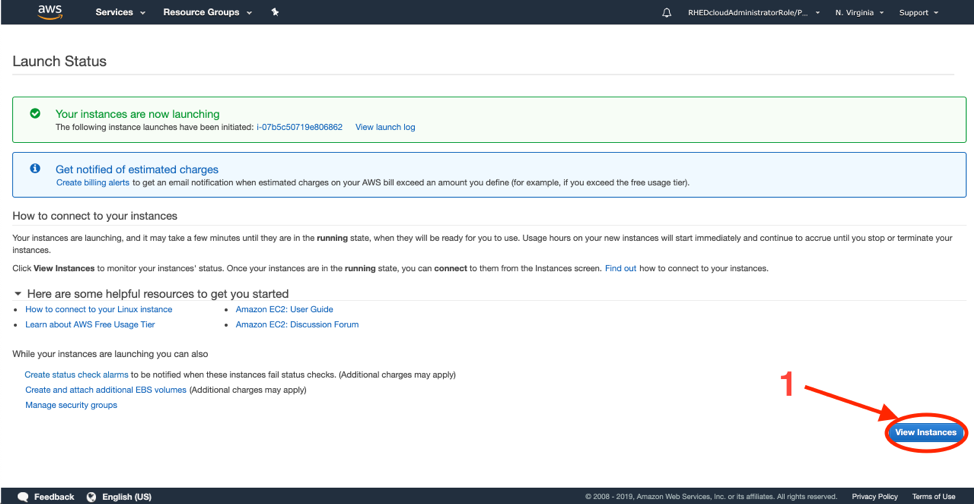
- On the following screen, scroll down and click the View Instances button in the bottom right
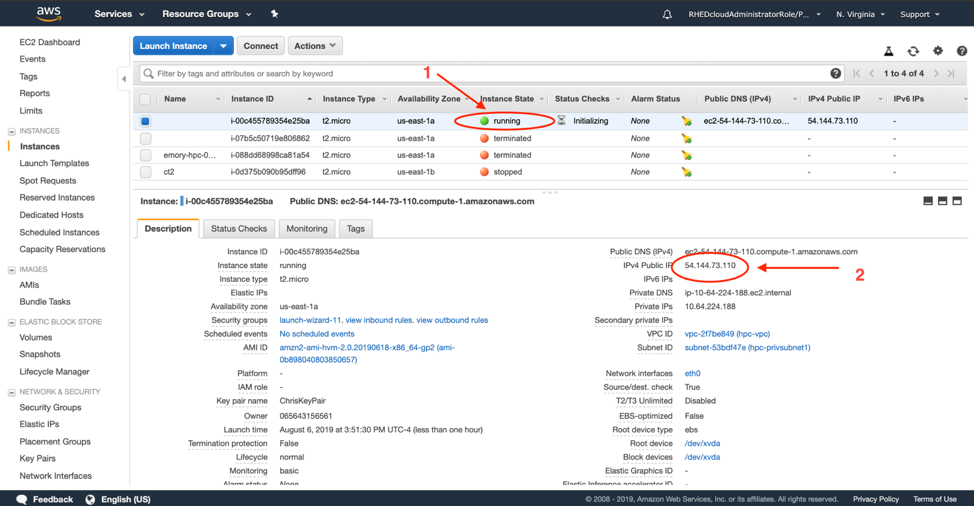
- Wait for your instance to enter the running state (you may need to click the refresh button in the top right of the page)
- Once your instance is ready try to login:
- Note the Private IP address of your EC2 instance
WINDOWS USERS STOP HERE and REFER the WINDOWS INSTRUCTIONS TO CONNECT
MAC USERS, Continue
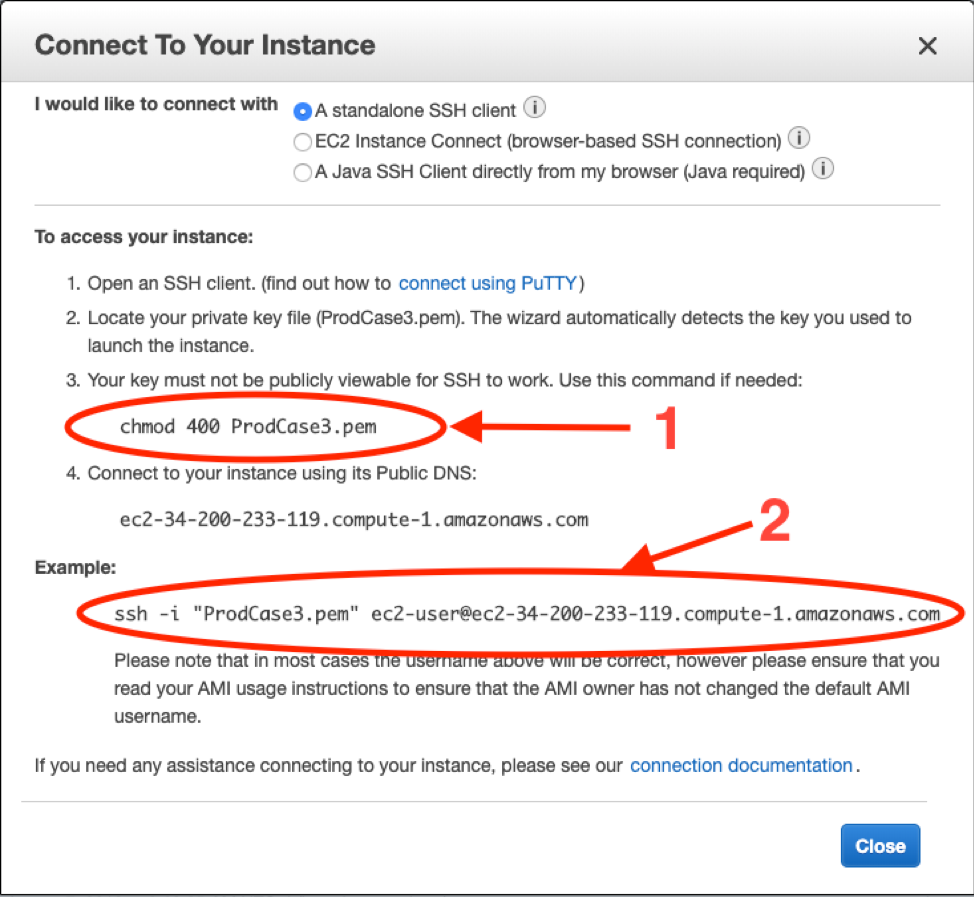
- Make sure your instance is highlighted and click the connect button at the top of the screen
- Note the two commands listed, the first is in step 3 of the instructions, the second is listed under Example:
- Open your favorite terminal program
- Change directories to the location of the PEM file you downloaded earlier (most likely in your downloads folder)
- cd ~/Downloads
- Run the first command you noted above
- chmod 400 FILE_NAME.PEM
- Now run the second command you noted above to SSH into your instance
- ssh -I "FILE_NAME.PEM" ec2-user@PUBLIC-DNS-NAME
- If you connect successfully, you will be asked if you are sure you want to connect to this
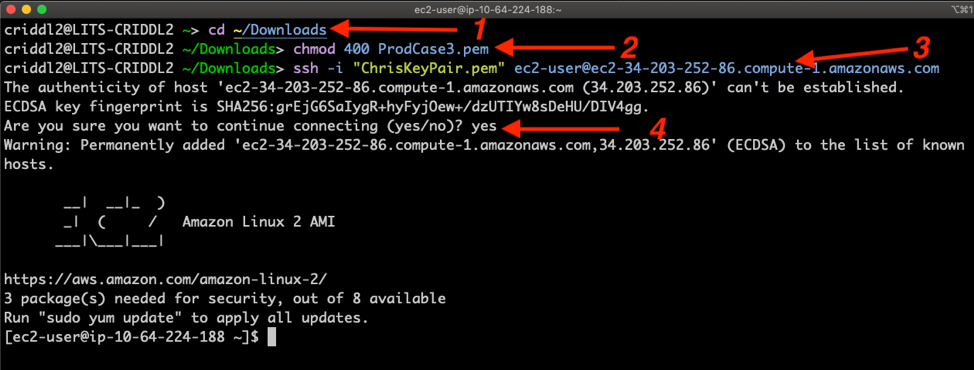
- enter "Yes"
- At this point you should be connected to your EC2 Instance